
Bi-Xenon HID Installation Guide: H4, H13 & 9007
Flashtech HID systems use a xenon bulb and ballast rather than powering the bulb directly from the vehicle connector. The exact harness differs between single-beam, Bi-Xenon and OEM-style D-series applications, but the installation sequence is consistent: verify fitment, mount the ballast, connect the harness, secure the wiring and test.
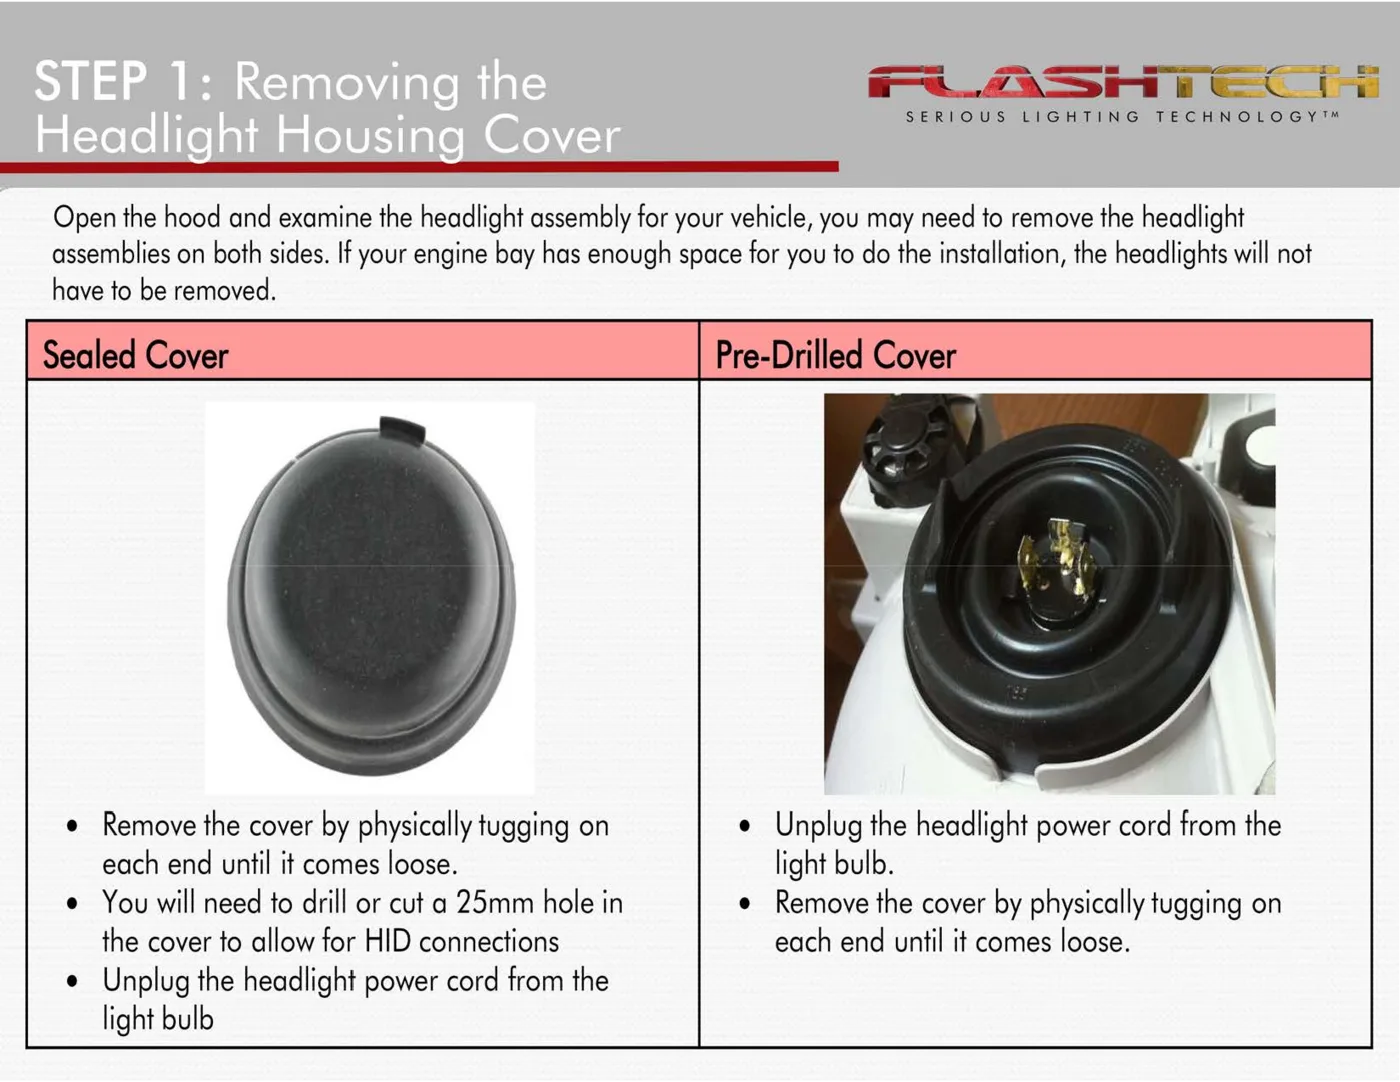
Identify the HID System
- Confirm bulb base, ballast type and whether the application is single-beam, Bi-Xenon or OEM D-series.
- Lay out the harness before mounting components so each lead reaches without tension.
- Inspect all waterproof seals and connectors.
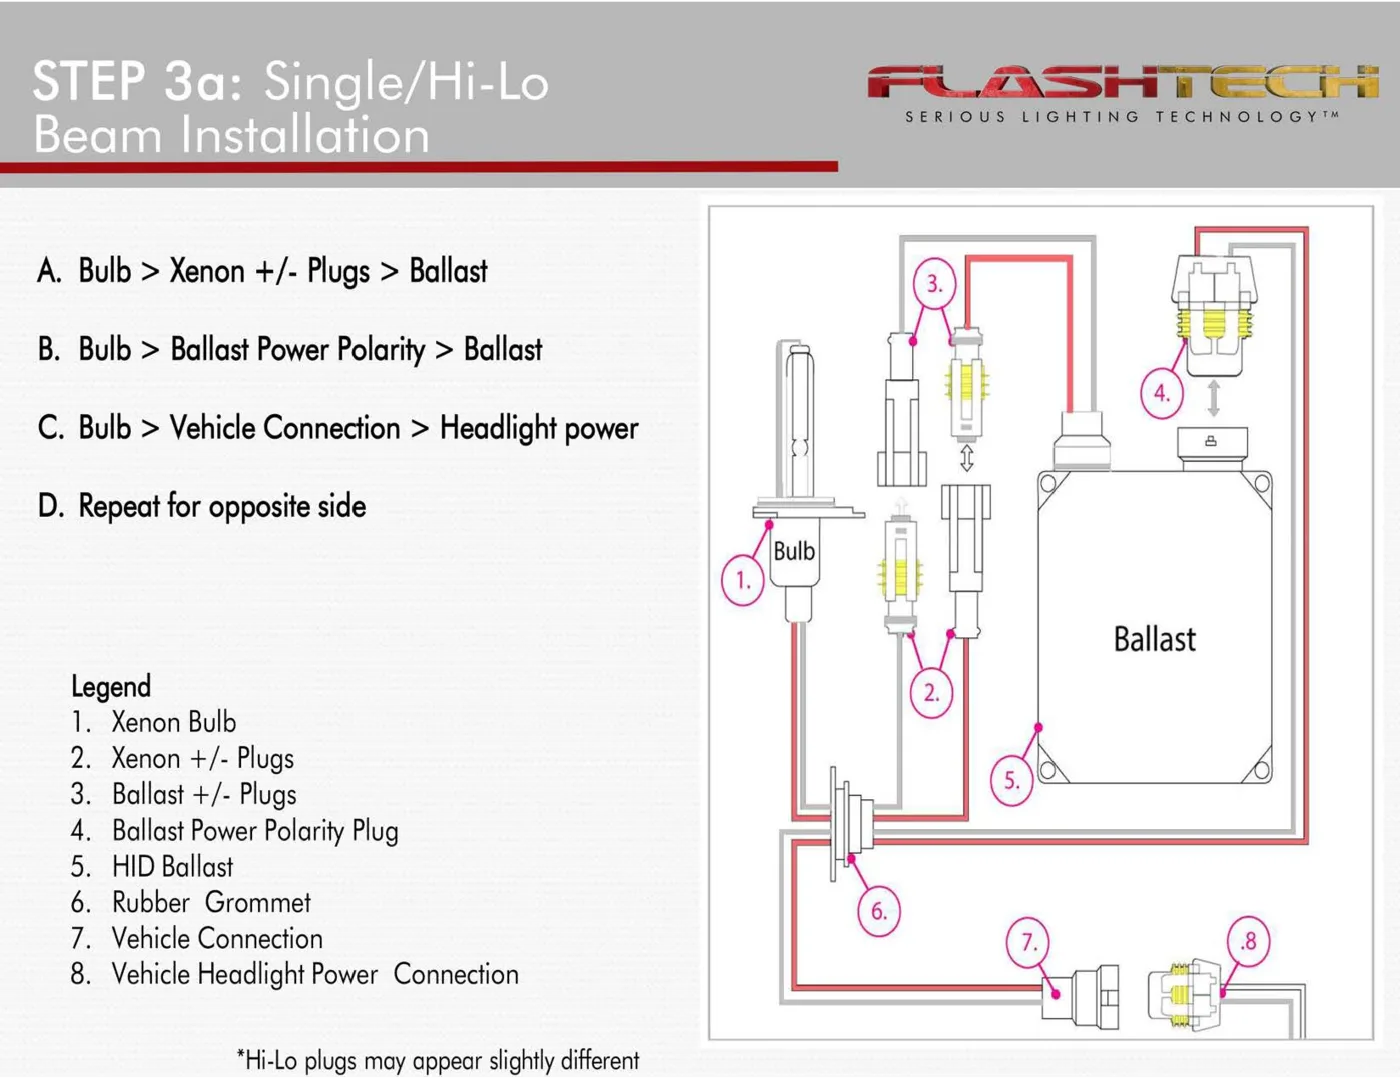
Install the HID Bulbs
- Remove the factory bulb using the vehicle's normal service procedure.
- Install the HID bulb without touching the quartz glass.
- Ensure the bulb is fully seated and locked in the correct orientation.
Mount the Ballasts
- Choose a dry, secure location away from exhaust heat, belts and moving components.
- Use the supplied mounting method and support the ballast so wiring does not carry its weight.
- Keep ballast leads away from sharp edges.
Connect Power and Harnesses
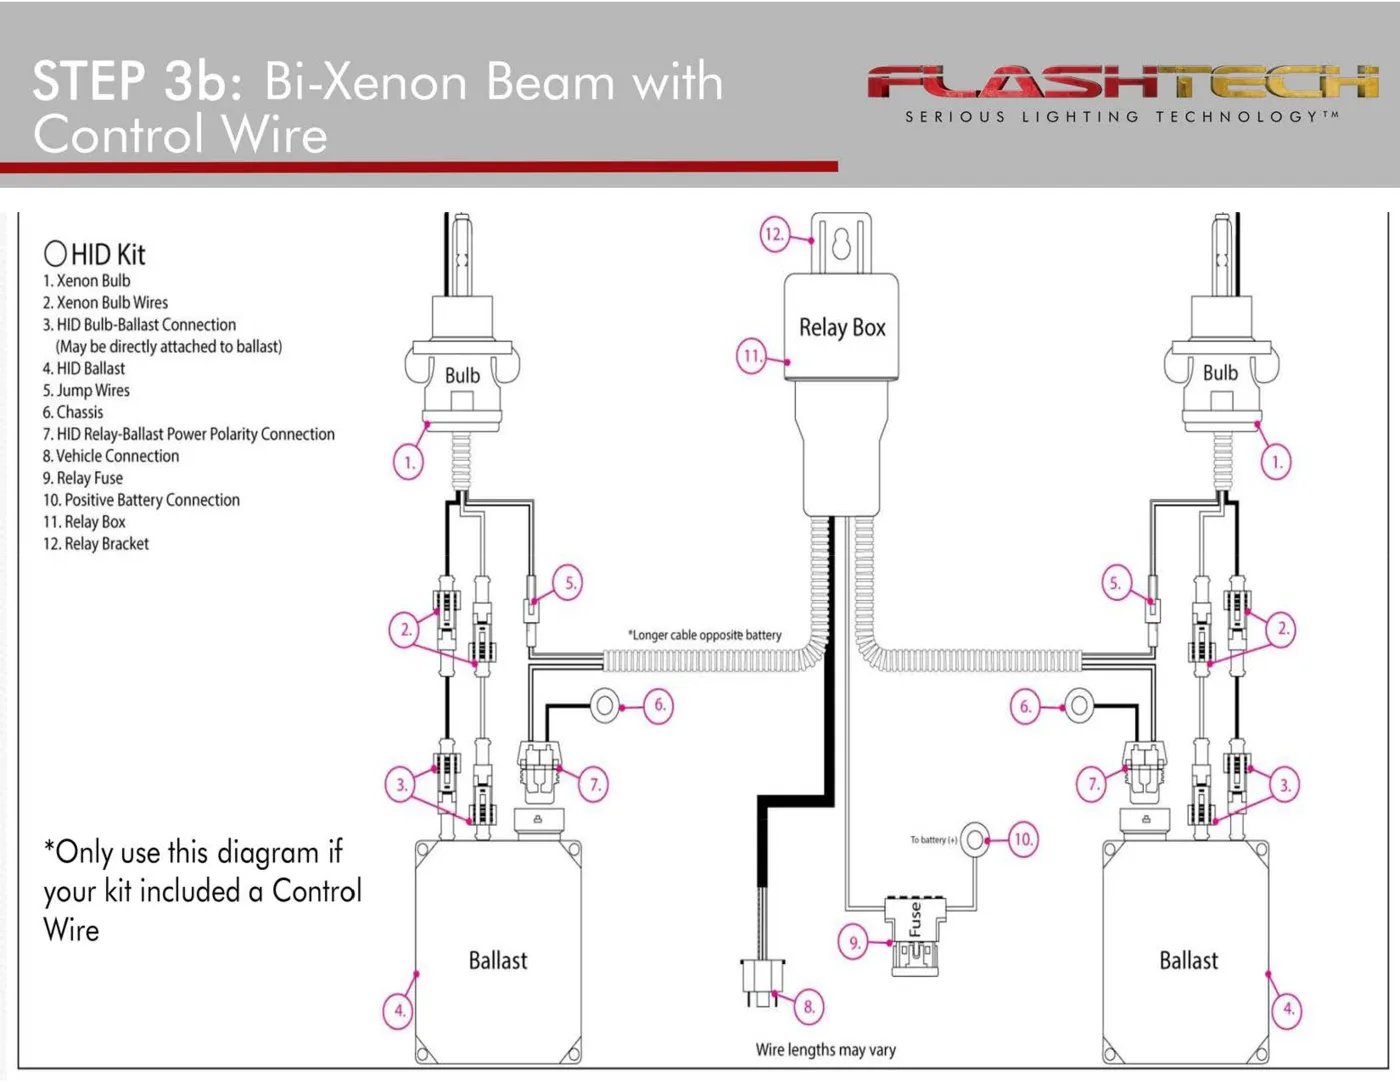
- Follow the Flashtech harness diagram for the specific kit.
- Use fused battery/relay connections when the kit requires them.
- For Bi-Xenon systems, connect the high/low control harness exactly as shown in the product guide.
Test and Secure
- Test both sides and all beam functions before reinstalling covers or trim.
- Secure every wire and connector and reinstall weather seals.
- Recheck operation after the first drive.
Installation Checklist
- All mounting hardware is secure.
- Wiring is protected from heat, sharp edges and moving components.
- Every connector is fully seated and supported.
- Power is fused appropriately and ground is secure.
- All lighting/controller functions were tested before final reassembly.
Frequently Asked Questions
Can I use this guide for every vehicle?
Use this as the general installation method. Vehicle access, factory wiring and exact fitment can differ, so product-specific or vehicle-specific instructions take priority.
Should I test the lights before mounting them?
Yes. Testing before permanent mounting makes it much easier to isolate a wiring, controller or product issue.
What if my connectors or hardware look different from the pictures?
Flashtech product generations can change. Match the instructions to the model number and hardware actually supplied with the product rather than forcing an older diagram to fit a newer kit.
When should I use a professional installer?
Use a qualified automotive or marine installer when the job requires vehicle disassembly, sealed-housing work, circuit diagnosis or wiring beyond your comfort level.
Related Flashtech Installation Guides
- HID Conversion Kit Installation Guide
- HID Troubleshooting: Flickering, One Side Out & No-Start Problems
- D1S, D2S, D3S & D4S HID Bulb Replacement Guide
- HID Ballast, Relay Harness & Power Wiring Guide
- 12-Volt Automotive LED Wiring: Fuses, Grounds, Relays & Power
Use the guide for your exact Flashtech product generation and confirm all wiring before applying power.
