
HID Troubleshooting: Flickering, One Side Out & No-Start Problems
Flashtech HID systems use a xenon bulb and ballast rather than powering the bulb directly from the vehicle connector. The exact harness differs between single-beam, Bi-Xenon and OEM-style D-series applications, but the installation sequence is consistent: verify fitment, mount the ballast, connect the harness, secure the wiring and test.
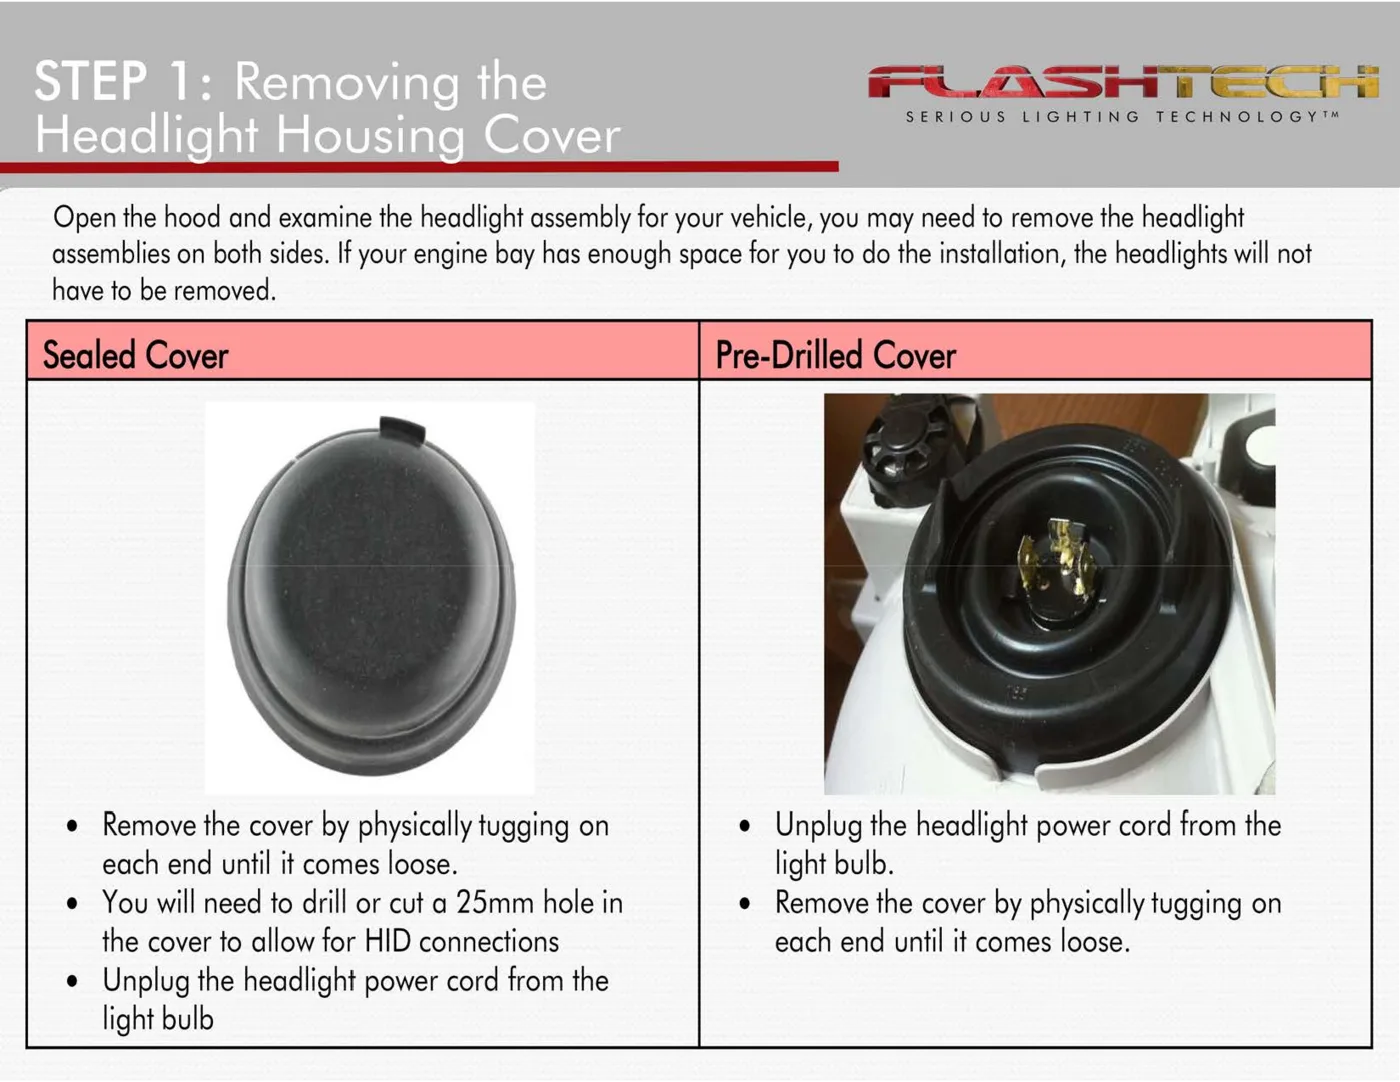
One Side Does Not Ignite
- Swap known-good low-voltage components side-to-side only when the connectors and product are identical.
- Check the vehicle input, ballast connection and bulb connection in a logical sequence.
- A problem that follows the bulb points to the bulb; one that stays with the side points toward vehicle power, harness or ballast.
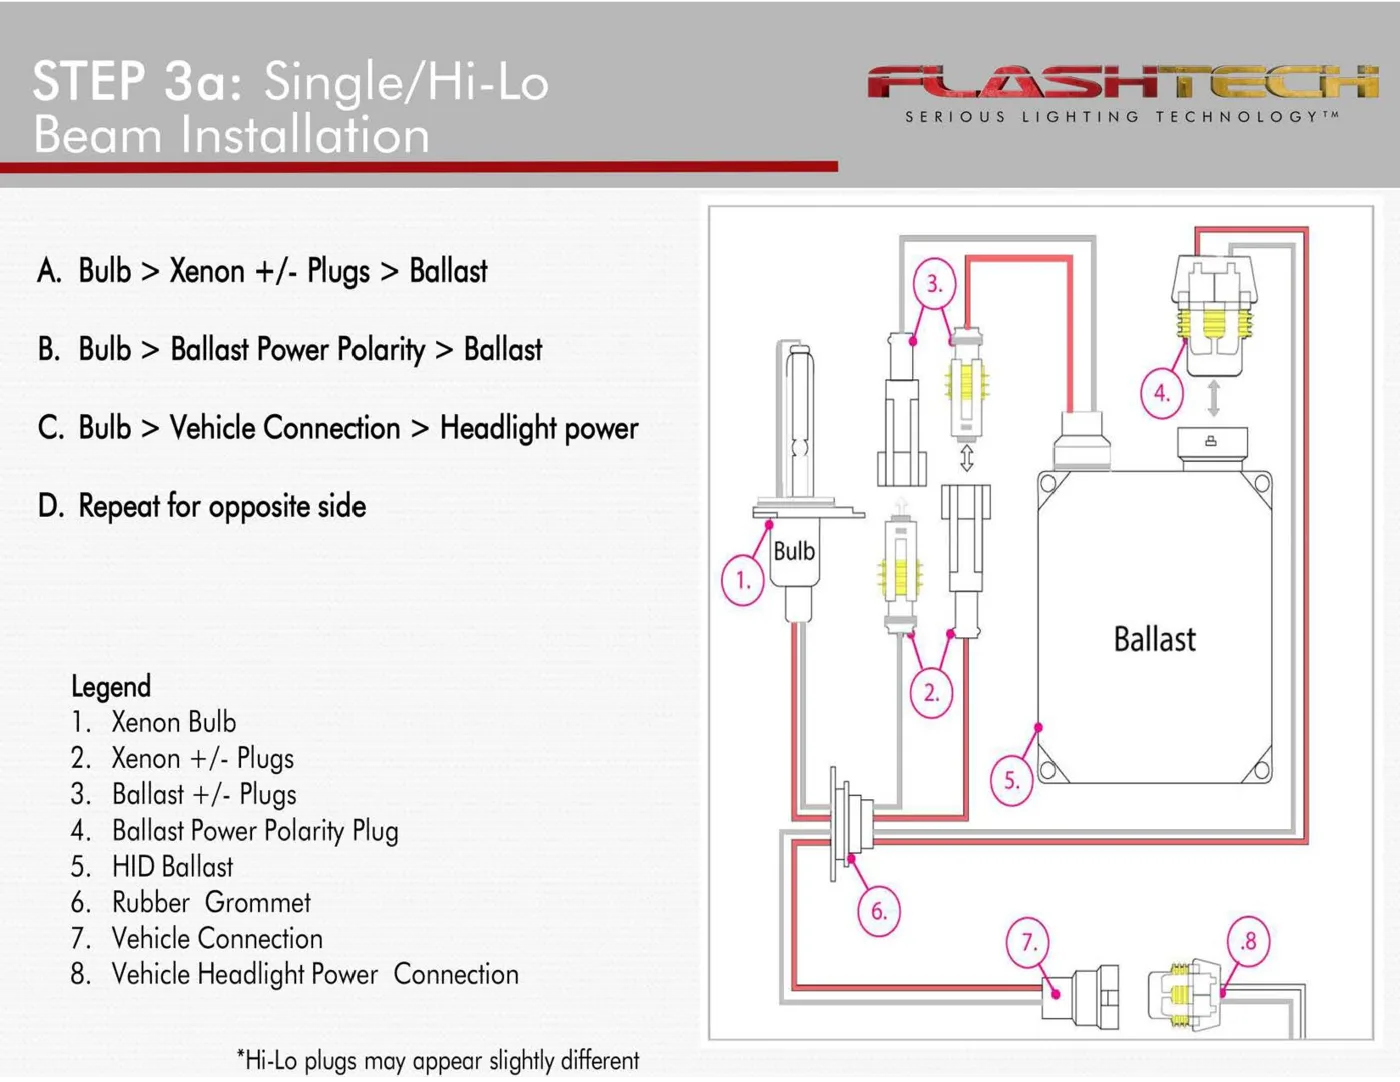
Flickering or Intermittent Operation
- Inspect grounds, connectors and ballast mounting.
- Look for loose pins, corrosion or water intrusion.
- Vehicle monitoring/PWM can require an appropriate harness or interface rather than repeated ballast replacement.
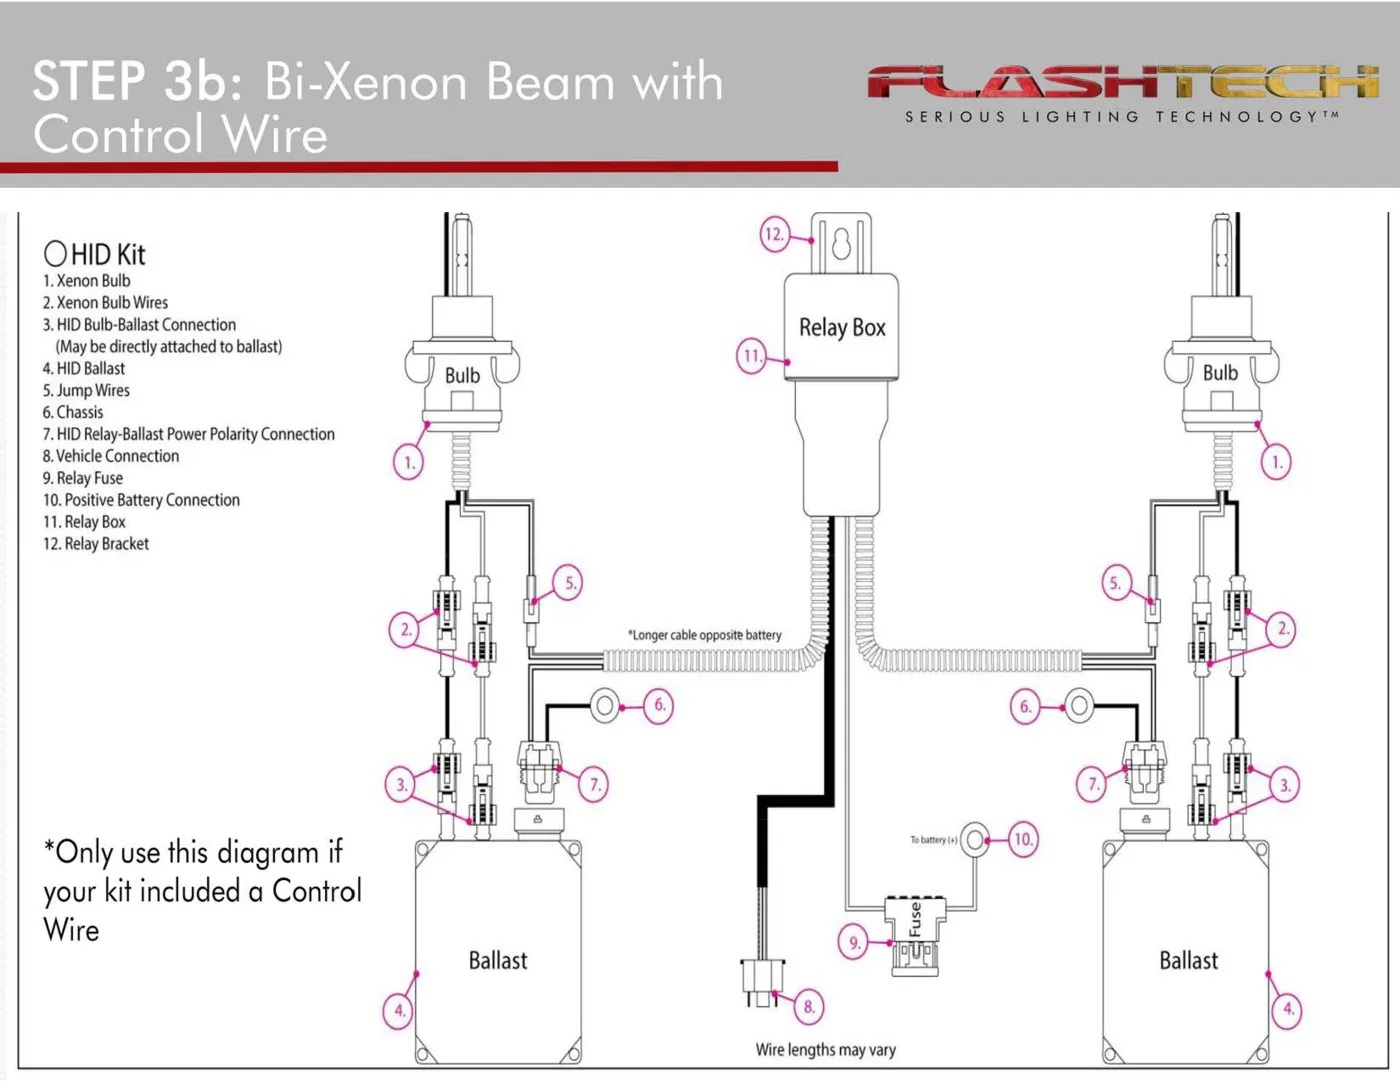
Both Sides Fail
- Check the fuse, relay harness if equipped, battery connection and common ground.
- Confirm the controller/high-low harness is connected on Bi-Xenon systems.
- Do not bypass fusing as a diagnostic shortcut.
Color or Brightness Mismatch
- New HID bulbs may require some operating time to stabilize.
- Verify both bulbs are the same type and color specification.
- Aging bulbs can shift color; replace matched pairs when appropriate.
Installation Checklist
- All mounting hardware is secure.
- Wiring is protected from heat, sharp edges and moving components.
- Every connector is fully seated and supported.
- Power is fused appropriately and ground is secure.
- All lighting/controller functions were tested before final reassembly.
Frequently Asked Questions
Can I use this guide for every vehicle?
Use this as the general installation method. Vehicle access, factory wiring and exact fitment can differ, so product-specific or vehicle-specific instructions take priority.
Should I test the lights before mounting them?
Yes. Testing before permanent mounting makes it much easier to isolate a wiring, controller or product issue.
What if my connectors or hardware look different from the pictures?
Flashtech product generations can change. Match the instructions to the model number and hardware actually supplied with the product rather than forcing an older diagram to fit a newer kit.
When should I use a professional installer?
Use a qualified automotive or marine installer when the job requires vehicle disassembly, sealed-housing work, circuit diagnosis or wiring beyond your comfort level.
Related Flashtech Installation Guides
- HID Conversion Kit Installation Guide
- Bi-Xenon HID Installation Guide: H4, H13 & 9007
- D1S, D2S, D3S & D4S HID Bulb Replacement Guide
- HID Ballast, Relay Harness & Power Wiring Guide
- 12-Volt Automotive LED Wiring: Fuses, Grounds, Relays & Power
Use the guide for your exact Flashtech product generation and confirm all wiring before applying power.
